
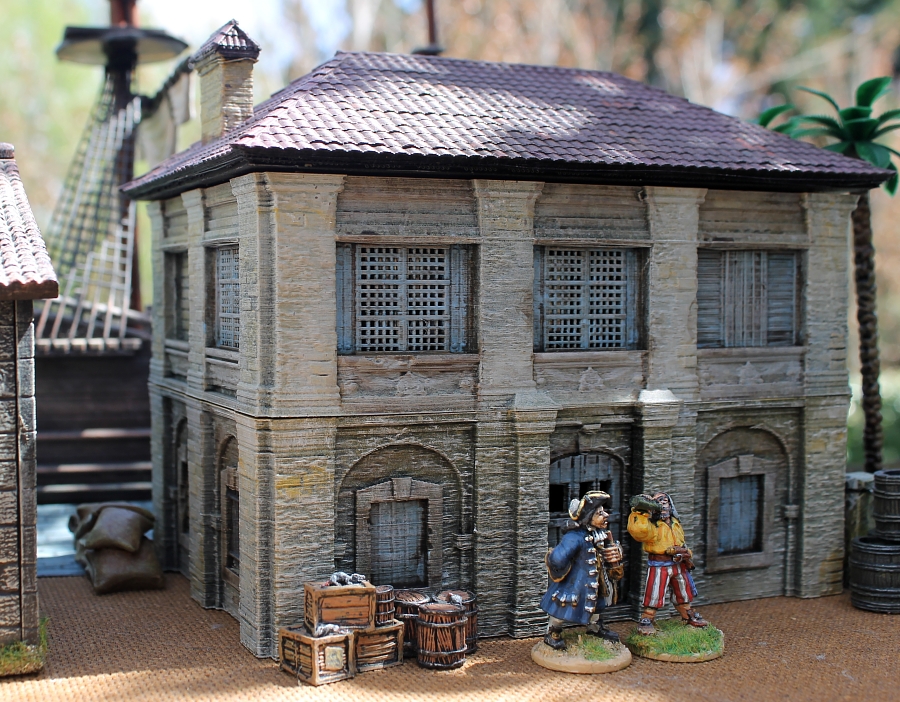
‘Arrr, me ‘earty – that thar 3-D printin’ is sure makin’ inroads into wargamin’, ain’t it!’ And especially so for terrain, as shown by this exciting new model from Printable Scenery for my 28mm pirate gaming. 
Matt from Printable Scenery asked if I could do a blog posting showing how to paint this first model in his new range of Caribbean building files, which I was very pleased to do. The painting didn’t take long – one day from start to finish. Here’s how I went about it:

The first step is to clean up any artifacts left over from the printing process, and then cover the whole model with black spray-paint. Apart from that, no other work was required to get the nice finish you see above.

The model prints in three pieces, which means you can view the interior of each floor. So the interiors also received a black undercoat.

The two storeys now received a light spray paint of sand colour (I used Tamiya model spray). I sprayed this in quick sweeps from above, so the remaining black undercoat would create the effect of shadows. The roof received a light spray too, but in a brick-red colour.

The interiors also got the light sand-coloured spray treatment. I don’t worry about over-spray on the floor – this all gets fixed later on.

Now comes my favourite step – dry-brushing the entire model with white. This really brings out the texture of the stone-work and tiles, and you start getting a feel of what the final product will look like.

I picked out some of the stonework with a yellow-ochre colour, then dry-brushed over it with white. The chimney has also been painted ochre and dry-brushed white.

I slapped some sky-blue paint onto all the windows and doors. As you can see, I was quite rough and ready with this job, but that doesn’t matter, as the next steps clean this up.

I coated all the blue windows in earth-coloured ink wash, and also inked in some of the shadowed areas in the stonework, such as under the arches. I then used my trusty white dry-brushing over all the windows – hey presto, sun-bleached light blue frames and shutters!

I picked out some random tiles with a range of colours, then game the whole roof another quick white dry-brush, before washing the whole roof with the earth-coloured ink to tone down the different shades.

The final step was to paint the interior. I dry-brushed white the previously sand-coloured walls. The furniture and window frames were mainly picked out with inks, but also a small amount of painting, for example the bottles and jars on the shelves. The floor received a wash of black ink to bring out the floorboard detail.

So there you have it, a perfect building for pirate games! Though, of course, this type of house could have many other uses – the Peninsular War springs to mind, or Maximilian’s Mexican Adventure, the Spanish Civil War, or even colonial games.
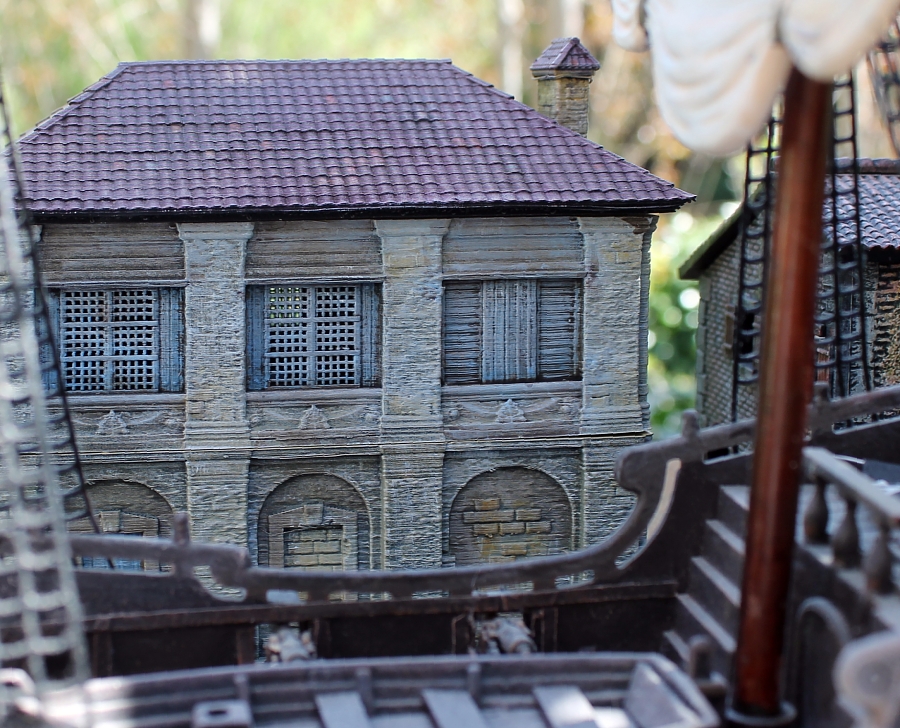
Here’s the rear of the building, as seen from a ship tied alongside the wharf. Matt designed the building in a semi-fortified state, with boarded and bricked windows on the ground floor as you would find is times of war and civil unrest. There is limited access on the ground floor, but lots of firing positions on the upper floors. Perfect for a last stand!

I’m really looking forward to seeing what other buildings Matt adds to Printable Scenery’s Caribbean range. I’ve plied him with photos of real buildings from Havana (Cuba), as well as pictures from the Disneyland ‘Pirates of the Caribbean’ ride – let’s see if any of these come to fruition!
For those who wish to know, the building was printed on a Prusa MK2, using ABS filament. It cost about US$8 to print. Each section took about ten hours, so was printed overnight. It was printed it at .2 layer height at slow speed. I got it as a raw print, not treated at all, but just primed in Warlord black primer.

Absolutely fabulous work Roly. Love to to see it in the flesh. Pete Dunn had some 3D printing at the Warlords yesterday 🙂
Printable Scenery have got some nice models, which you’ll start seeing round a bit, I would guess. Both historical and fantasy are covered.
That’s fantastic!
Thanks. I was pleased with how it came out, too.
A great looking model.
Tony
Thanks, Tony.
Hi, what resolution did you print at? It sounds like you didn’t need to do any sanding or acetone bath before you spray primed it?
Harry
The building was printed on a Prusa MK2, using ABS filament. It cost about US$8 to print. Each section took about ten hours, so was printed overnight. It was printed it at .2 layer height at slow speed. I got it as a raw print, not treated at all with acetone, but just primed in Warlord black primer.
A very nice model beautifully painted with some interesting techniques. Thanks for the tutorial
Chris
Thanks for the comment, Chris.